 At a back to school party this weekend, one of the parents asked what I did. After I explained identity and access management, this parent sounded a familiar refrain, "why do I need so many passwords?" After the perfunctory and admittedly glib, "because you don't use EmpowerID", I gave the real answer: because not everyone knows how simple it is.
Because it really is simple. Federated single signon with SAML (Security Assertion Markup Language) is easy. There are only three parties involved: the user, the service provider and the identity provider. And IT controls both the service and identity providers (good luck with that user!).
I'm picking salesforce.com as an example because it is common. Your user has an identity provider (in this case EmpowerID) which authenticates that user into the network. They check their email and then get down to the business of making sales. When they go to salesforce.com (the service provider), that user will be instantly redirected back to EmpowerID without them knowing. EmpowerID knows they are authenticated and then sends a token to salesforce.com with that users credentials and the user is logged in to salesforce.com without them even knowing what happened. They then make your company a lot of money.
The behind the scenes stuff isn't too much trickier. You have to configure the identity provider (EmpowerID), the service provider (salesforce), and give the user the correct URL to log in. We have a whole wiki article on configuring this federated single signon, but I'll summarize for the blog:
Configuring the identity provider:- create a Salesforce service provider in EmpowerID
- configure the SAML settings including:
- Name and Display Name: These are the name and display names you supplied for the SSO Connection when you created it.
- Issuer: This is the party issuing the SAML assertion attesting to the user's identity. The value here should be EmpowerID.
- TargetIDP/SP URL:This is the URL for accessing your Salesforce.com account from EmpowerID. When first created, EmpowerID populates this field with the relative path to the SSO Service and Connection ID only. To complete the full path, concatenate this with the FQDN of the EmpowerID web server in your environment.
- ACS URL: This is the URL to the Assertion Consumer Service for the application. The value here should be the base login for Salesforce.com.
- Enable ACS SSO Connect Query String: This field should be deselected.
- Login Workflow ACS URL: This is the URL to the EmpowerID Login workflow. This workflow verifies the identity and account ownership of any person logging in to EmpowerID.
- Endpoint Binding: This specified the type of binding used for the SAML assertion. The value here should be "HTTPPost."
- Authentication Request: Leave this field empty.
- Format: This specifies the format of the assertion used to identity a user to the service provider, if any. The value here should be "Unspecified."
- Account Store: This specifies the account store in which each EmpowerID is to place each registered account. When the SSO Connection is created, EmpowerID automatically creates the corresponding account store for the connection. When an EmpowerID Person claims and registers an account from the Corporate Salesforce SSO application, EmpowerID places their account in the Corporate Salesforce account store created for the application and links the account to that user's EmpowerID Person.
- Login Tile Image URL: This points to the image that is used in EmpowerID as link for accessing the service provider.
- Description: This is the description you supplied for the SSO Connection when you created it.
- Verify all of the settings
Configuring the service provider:
- From your web browser, log in to your Salesforce.com account as an adminstrator.
- In Salesforce, click on the Setup link at the top of the page, navigate to Security Controls > Single Sign-On Settings under Administration Setup and click Edit.
- Tick SAML Enabled to view the SAML sigle sign-on settings.
- Specify SAML 2.0 as the SAML version.
- Enter "EmpowerID" in the Issuer field.
- Browse for and upload the STS certificate used in your EmpowerID deployment.
- In the Identity Provider Login URL text field, enter the value of the Target IDP/SP URL for the Salesforce SP SSO Connection. This URL is used to access Salesforce.com accounts from EmpowerID.
- From the SAML User ID Type checkbox, select Assertion contains User's salesforce.com username.
- From the SAML User ID Location checkbox, select User ID is in the NameIdentifier element of the Subject statement.
- From the Entity Id checkbox, select https://saml.salesforce.com.
- Save your changes.
Configuring users:
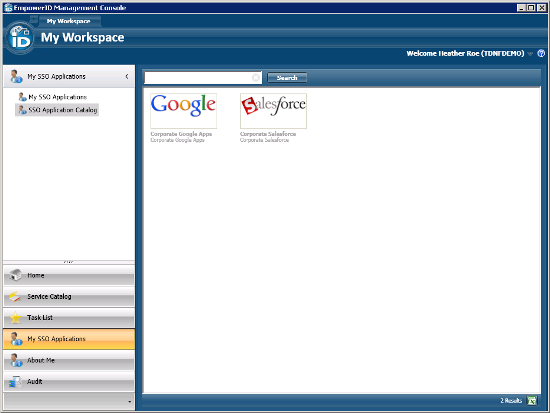
Users logged into the EmpowerID Management Console can request that their Salesforce accounts be registered with EmpowerID by clicking on the tile. This sends the request to an approver. Once the request is approved, a tile for the Salesforce SSO Application is placed in the My SSO Applications pane, allowing users to seamlessly access their Salesforce.com accounts from EmpowerID. That tile is in essence a URL, they can bookmark it, have it in the intranet or click from anywhere in the network for seamless federated single signon with Salesforce.
Once you have done this (and it is this easy with all SAML applications), you can solve that "I have too many passwords" problem and give me less to talk about at cocktail parties.
Check out our whitepaper on the top 5 federated single sign on scenarios or arrange for a demonstration of how EmpowerID can be your identity provider of choice!

Tags: Single Sign-on (SSO)
